All my social media will continue to stay the same.


When I smell granola cooking I know school is in session and fall is on the way! Granola is a great way to start the day. Top your favorite yogurt, prepare it as you would cereal, or just simple eat it by the handfuls. Homemade granola does not last long around here, so you better get some while you can!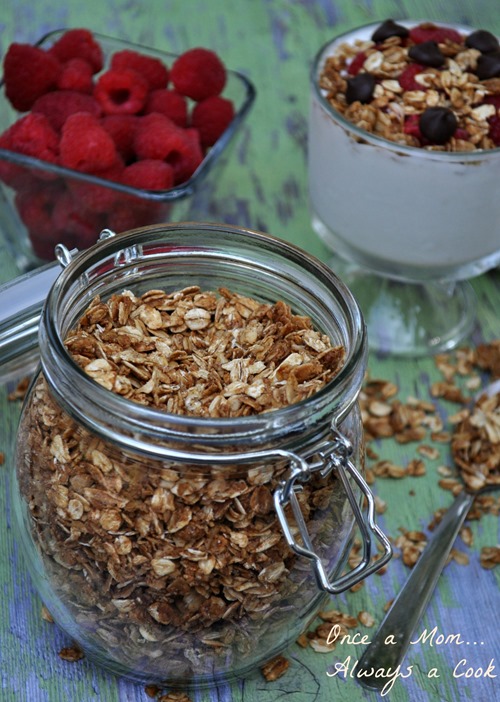
Hey everyone! I know I haven't been around much the last few months, but my children have kept me busy all summer long. Now that the kiddos are back in school, I can breath for just a moment and share a yummy recipe with you.
This drink is very similar to the original Orange Julius, though it may not be exactly the same, it is just as delicious! My family adores this recipe and I hope you and your family will too. This Dairy Free Orange Julius is a perfect way to start the day!
I know you are ready for the recipe, so let's get started...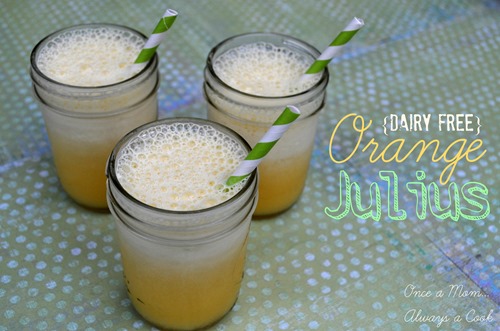
It’s summer and the kiddos are hungry all day long! I am visiting my sister in Wisconsin right now and between us we have six hungry kids. For lunch a few days ago I whipped this yummy meal up in no time. My mother used to make these quick oven nachos for my sister and I when we were younger, so this meal brought back great memories!
Now on to the recipe…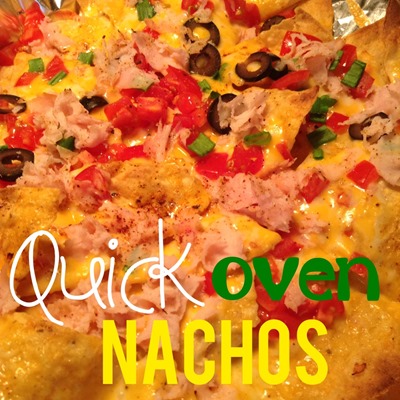
Ingredients:
tortilla chips
shredded colby jack cheese
thinly sliced deli turkey, cut into bit size pieces
fresh diced tomatoes
green onions, chopped
sliced black olives
chili powder
cumin
fresh ground pepper
First line a baking sheet with foil, then spread out a layer of tortilla chips. Next sprinkle your desired amount of cheese and evenly layer the rest of your toppings. Lightly sprinkle chili powder, cumin, and fresh ground pepper over the nachos. Now place the nachos under broil just until the cheese is melted. Please don’t leave your nachos unattended because it does not take long. Serve nachos warm and garnish with a dollop of sour cream or guacamole.
The great thing about making these nachos is you can easily accommodate everyone's dislikes and likes all on one platter! For example, people who don’t like tomatoes only put tomatoes on half and so on. Please do not feel limited to my ingredient list, have fun making your own creation.
Enjoy!
The heat is on and what better way to cool down with than a Watermelon Agave Popsicle! These refreshing homemade popsicles are not only yummy,
but are easy to make too.
All you need is two ingredients, watermelon and agave nectar.
I hope you and your family will try this recipe before the weather starts to cool down because these Watermelon Agave Popsicles are a wonderful summertime treat I don’t want you to miss!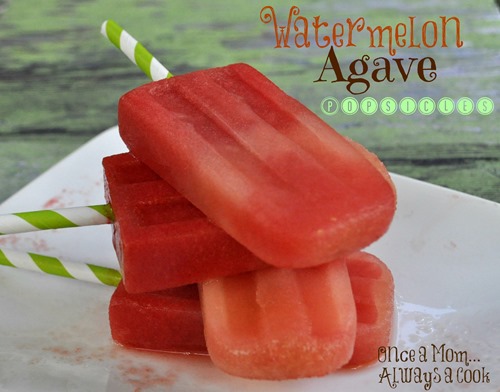
Ingredients:
makes 12-14 popsicles depending on the size of your molds
8 cups of seeded, balled or cubed watermelon
1/4 cup of agave nectar
In a blender or food processer combine 8 cups of watermelon and 1/4 cup of agave nectar and puree. Then pour the mixture into your popsicle molds and freeze until hardened.
Enjoy!
A few tips for inserting popsicle sticks:
~If using wooden popsicle sticks soak for at least 30 minutes before making the popsicle mixture.
~In the picture above I used a sturdy paper straw as the sticks. I froze the
popsicles until slushy and then inserted the straws so they would not float to the top.
|
Posted By: Christian (Audra’s daughter)
I live in Texas, and here summer is dreadfully hot! The temperature always seems to be a steamy hundred degrees. Here it is not safe to go outside without a bottle of water, because the fear of dehydration is serious. Ok… I may be exaggerating a little, but not by much. Us Texan’s have to find ways to keep cool during summer, and my peach blackberry colada popsicles will do just the trick! This popsicle is very refreshing after yard work, a work out, or just being outside in general. Hey, they are even enjoyable after a walk around the house, because even my house seems toasty in this sun!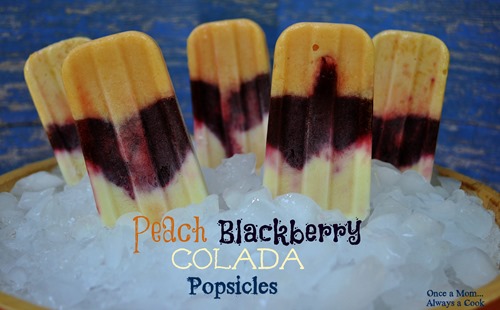
Makes about 10-12 popsicles
Ingredients:
Peach layer
2 Cups frozen peaches thawed
3-4 TBS SO Delicious Coconut Milk: Vanilla Creamer
1 TBS of Simple Syrup (recipe below)
Blackberry layer
2 Cups frozen blackberries thawed
3-4 TBS So Delicious Coconut Milk: Vanilla Creamer
1 TBS of Simple Syrup (recipe below)
Colada layer
1/2 cup fresh pineapple cubed
3/4 cup canned coconut milk
1/4 cup So Delicious Coconut Milk: Vanilla Creamer
remainder of the simple syrup
Simple Syrup
1/4 cup + 1 TBS sugar
1/4 cup + 1 TBS water
In a small sauce pan combine sugar and water over medium heat until sugar is completely dissolved. Set the Simple Syrup aside for later use.
Directions:
Method to unthaw fruit fast: Being the innovative person I am, I put the frozen peaches and blackberries in separate bowls, covered the bowls with foil, and placed them outside to let the hundred degree sun thaw the fruit. Takes about a full hour to a hour and a half.
Place thawed peaches, So Delicious Coconut Milk: Vanilla Creamer, and 1 TBS of Simple Syrup in a blender and blend until pureed. Pour the peach puree into into popsicle molds, I poured about 1-2 TBS of puree in each mold, and DO NOT place the sticks in until the second layer. Place in the freezer and let the peach layer freeze for an hour or until the peach layer is mostly frozen. By doing this it ensures your popsicles will have defined layers.
Next, place thawed blackberries, So Delicious Coconut Milk: Vanilla Creamer, and 1TBS of Simple Syrup into the blender and blend until pureed. If you would like to remove the seeds as I did, place a fine mesh strainer over a bowl and pour blackberry mixture into the fine mesh strainer and work the mixture through the strainer with a spoon. Once seeds are removed, pour the blackberry layer into the popsicle molds, I poured about 1-2 TBLS of puree into each mold. Now place sticks in the molds and place back into the freezer for about an hour, or until the blackberry layer is slightly frozen.
Now, place pineapple, So Delicious Coconut Milk: Vanilla Creamer, Coconut Milk, and the remainder of the simple syrup into the blender and blend until all combined. Pour the colada mixture into the remaining space of the popsicle molds. Place in the freezer and allow popsicles to freeze for about 4 hours or until completely frozen.
Enjoy!
Last week I posted my homemade chicken stock and shredded chicken recipe, click here if you missed the post. So today I am going to share an amazing recipe for Shredded Chicken Quesadillas. It is definitely the shredded chicken that makes this recipe so fresh. The chicken is so tender and full of flavor. I know you are ready for the recipe so lets get started...
This recipe serves 2-4, but definitely double the recipe if needed.
Ingredients:
olive oil
4 taco size flour tortillas
1 1/4 cups shredded chicken
click here for my homemade shredded chicken recipe
chili powder (to taste)
cumin (to taste)
salt and pepper (to taste)
corn salsa, recipe below
fresh chopped cilantro (to taste)
shredded colby jack cheese
Corn Salsa
2/3 cup corn frozen or fresh
1/2 red bell pepper, finely chopped
1 TBS shallots, finely chopped
olive oil
In a small sauté pan warm 1 TBS of olive oil over medium heat. Add corn, bell peppers, and shallots. Combine all ingredients and sauté for about 5 minutes. Set aside for the chicken quesadillas.
Directions:
First heat and lightly oil your griddle or pan over medium heat, adjust heat as needed. Divide ingredients between two tortillas. Layer your toppings: cheese, shredded chicken, sprinkles of chili powder, sprinkles of cumin, corn salsa, fresh cilantro, and finally your last layer of cheese on the first tortilla. Top with the additional tortilla and cook until the cheese is melted and the bottom tortilla is golden brown. Now carefully flip the quesadilla with a spatula and allow the other side to lightly brown while gently pressing down on the top of the tortilla.Slice the quesadillas in 4 equal sections and serve with a side salad, a dollop of sour cream, chips, and salsa. These yummy quesadillas also pair well with my
pico de gallo and creamy avocado dip.
Enjoy!
Today I am going to share my recipe for homemade chicken stock and shredded chicken. I will be honest, in the past I rarely made homemade chicken stock unless it was around the holidays. I often bought the organic chicken stock cartons from the grocery store because it was one last thing I had to do in the kitchen. Well things have recently changed because of my daughter's diet and I now have to make homemade chicken stock for all my recipes that require chicken stock.
My daughter is 16 years old and has suffered from severe migraines since the 8th grade and it has been one awful ride. We have tried everything from chiropractic care to migraine preventatives and nothing seem to truly work, until one doctor at a urgent care clinic suggested a low tyramine diet. I have never even heard of this diet before we stepped into this clinic. My daughter was not happy and thrilled at first, but she was so fed up with the pain and sickness that accommodated these migraine episodes that she was willing to give it a try.
I can not tell you how wonderful it has been! She is off her preventives, no more sickness, and no migraines, all because of her diet! I am amazed! Here is a link to a low tyramine diet that we follow religiously.
http://www.headaches.org/pdf/Diet.pdf
Below is a link to hidden MSG in your food
http://www.truthinlabeling.org/hiddensources.html
(I have not found a safe shelved organic chicken broth that does not have yeast extract. This was a huge migraine source for my daughter.)
I will be truthful, I am cooking more than I ever have and out to eat options are very limited, but the results have been tremendous!
I know you are ready for the recipe, so let's get started...
I used:
3 lbs whole organic chicken
10 springs of thyme
4 sprigs of rosemary
2 bay leafs
5 stalks of celery
3 medium carrots
4 whole shallots
5 garlic cloves
1/2 TBS of whole peppercorns
1 tsp kosher salt
This batch made 3- 32 oz containers of broth and approximately 4 cups of shredded chicken.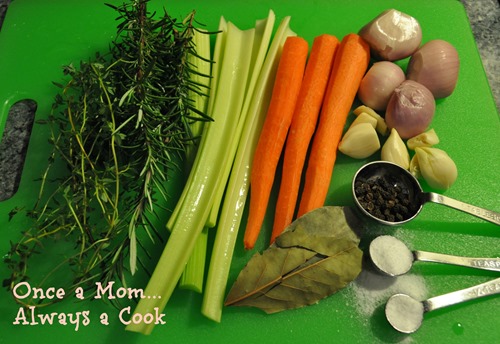
Please do not feel limited to my ingredients, homemade chicken broth is basically fool proof. You can use any variety of herbs, vegetables and seasonings. Although celery, carrots, and onions should be a must.
Directions:
Take the chicken out of the packaging and pat dry with paper towels. Sometimes a whole chicken may have a giblet package or the kidneys left on the inside, so be sure to remove those before cooking. Place the chicken in a large stock pot and fill with enough water to just cover the chicken. Next, add all the herbs, vegetables, and seasonings. Cover and simmer for at least 2 hours.
When the chicken is ready (falling apart tender). Remove the whole chicken from the pot with tongs. I use a pie plate to place the chicken on. Once the chicken is cool enough, remove skin, shred and debone. Use the shredded chicken in any recipe you desire. This shredded chicken goes really well in my
Chicken Enchiladas with a Cream of Jalapeno Sauce!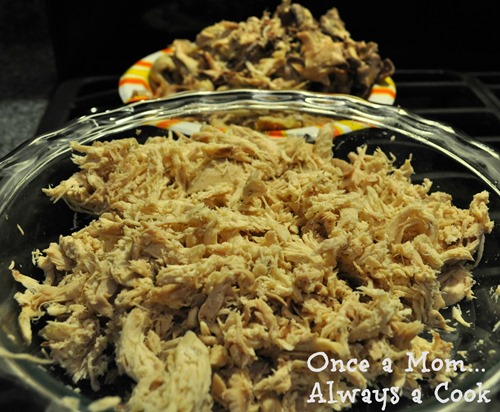
Once you remove the chicken from the broth place a large bowl in a ice bath in the sink. Then place a fine mesh strainer over the bowl and slowly pour the broth over the strainer. 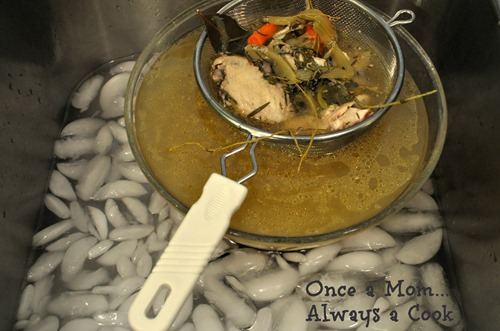
Now that your broth has cooled let it set in the fridge overnight. This will allow the fat to be easily removed. As you can see below the fat rises to the top and hardens. Remove and discard the fat with a slotted spoon.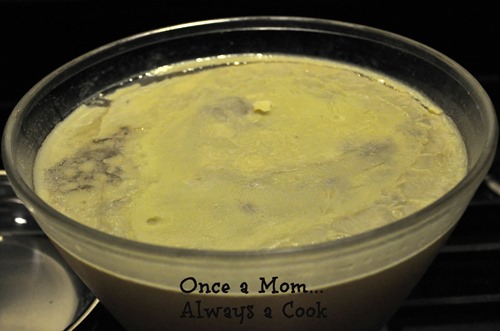
Now you are ready to store the chicken broth in the fridge for up to 2 days or in the freezer for up to 3 months.
When freezing only fill liquids to the bottom line.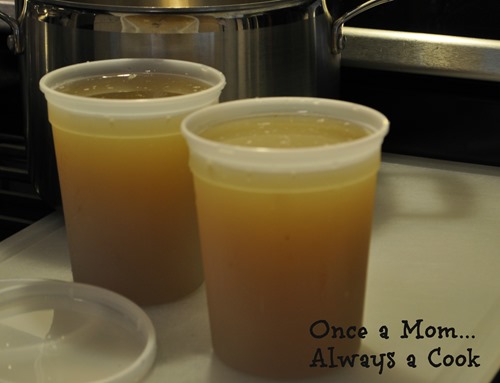
If you are looking for awesome freezer storage containers such as these, I bought my from amazon. Click on the picture below and it will lead you straight to the page where you can purchase these wonderful containers. I absolutely love mine and do not only use them for broth, but they are great for freezing soups too. I use the smaller ones for freezing left overs and it works great on nights when I don't have anything planned!
As you can see mint is exploding in my garden and what better way to use it than in a Blackberry Mint Spritzer.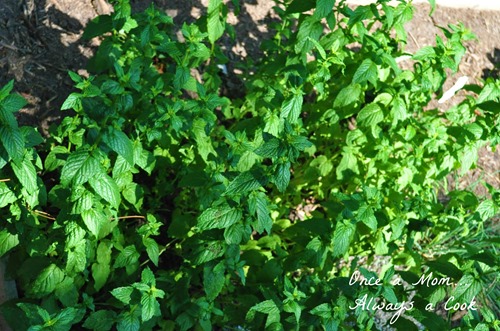
This refreshing summer time drink was initially designed by my lovely daughter, she is the drink and cupcake creator of the family! She is still in school this week, but wanted me to get this post up for everyone to enjoy :) I love all the combinations of this Blackberry Mint Spritzer, it is perfect for a warm summer night. I hope you and your family will enjoy this wonderful drink at your next outdoor gathering.
Ingredients:
1- 2 liter of Sprite (or any other soda that is similar)
Place Sprite in the freezer for an hour or refrigerate overnight.
1/2 cup fresh mint, packed
2 1/4 cup of fresh blackberries
Directions:
In a blender combine blackberries and mint, blend until well combined. Then slowly pour the soda in a gallon size pitcher. Place a fine mesh strainer over the pitcher and slowly pour the blackberry mixture into the strainer. Work the mixture through the strainer with a spoon to remove the blackberry seeds. Once the blackberry mixture has been strained stir slowly to combine all flavors. Then serve over ice and garnish with additional mint and blackberries.
Enjoy!
I have really enjoyed my time off with my kiddos and trying to get the house organized! I don't know if that task will ever be truly accomplished, but I try my best :) This summer I will keep the menu light and will only post one recipe a week. My daughter will also drop in with recipes now that school is coming to an end. Today I am sharing a new recipe that I hope you and your family will enjoy,Tortilla Crusted Tilapia! I know you are ready for the recipe so let's get started...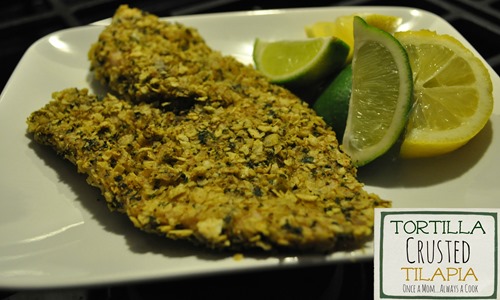
Ingredients:
4 tilapia fillets
2 eggs
1/2 cup flour
a bag of your favorite tortilla chips
(I use El Milagro tortilla chips. They are unsalted, so if you use a salted tortilla chip you may not need to add salt to the mixture.)
1 tsp chili powder
1 tsp dried oregano
1/2 tsp garlic powder
1/2 tsp cumin
salt and pepper (to taste)
a small bunch of cilantro, a hand full
(washed, dried, and stems cut)
lemon and lime wedges for serving
Directions:
In a food processor (I used a 9 cup food processor) add cilantro and then fill to the top with tortilla chips. Then add seasonings: chili powder, oregano, garlic powder, cumin, salt and pepper. Process on high until chips and seasoning are blended into a fine crumb. 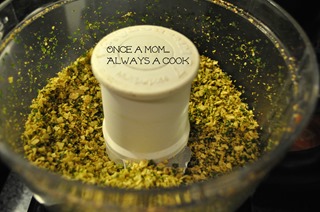
Next prepare 3 different stations for dredging, I personally use pie plates. In one pie plate place the flour, in the second one slightly beat the eggs, and the third place the tortilla crumbs. Dredge your tilapia fillets in the flour, then the eggs, and last the tortilla crumbs. Make sure you coat each side of the fish!
Place fillets on a baking sheet lined with parchment paper and bake at 350 degrees in a preheated oven for 20-25 minutes (depending on the thickness of the fillets) or until the fish flakes easily with a fork.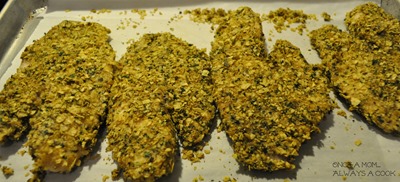
Serve with Mexican rice, pico de gallo, or a warm corn and black bean salsa.
Enjoy!
Posted By: Christian (Audra’s daughter)
I have to admit here in Texas we have had a cooler spring than usual. However, with summer around the corner temps are beginning to rise, I find myself baking with more refreshing and cooler flavors. The cupcake I am about to share with you has been in my recipe book for awhile, since I was about fourteen. At that time in my life I could not get enough Sunkist to drink, and I began using the citrus soda to bake with. I have not made this recipe in a while and last weekend I rediscovered it in my recipe book, and after tasting this refreshing cupcake I knew I had to share the recipe with my mother’s lovely readers. So lets get baking!
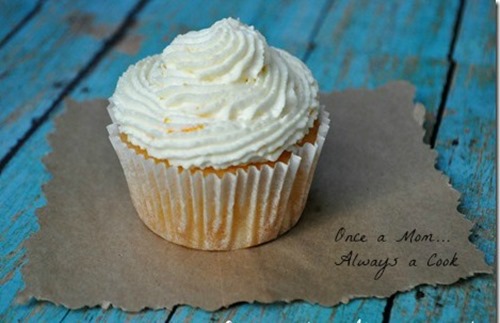
Ingredients:
Yields 12 cupcakes
1/2 cup butter at room temp.
3/4 cup sugar
2 eggs
1/2 tsp vanilla
1 1/2 cup flour
3/4 tsp baking powder
1/2 cup Sunkist
3 TBS half and half
1/2 TBS orange zest (1 large orange)
Cream Topping
1 cup heaving whipping cream
1/4 cup butter at room temp.
3-4 TBS powder sugar
1/2 TBS orange zest (1 large orange)
Directions:
1. Preheat oven to 350 degrees F . Line a muffin pan with paper liners.
2. In a medium bowl, cream together the sugar and butter. Beat in the eggs, one at a time, then add vanilla. In a small bowl, combine flour and baking powder, add to the creamed mixture and mix well. Then stir in the Sunkist and half and half until batter is smooth. Pour or use an ice cream scoop to place batter into the prepared pan. Fill each muffin cup about 3/4 full.
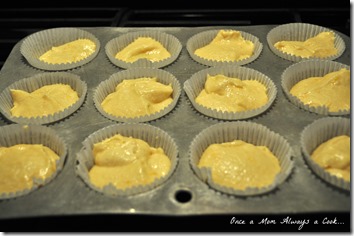
3. Bake 20 to 25 minutes.
Cupcakes are done when it springs back to the touch. Let cupcakes cool completely before applying icing.
Directions for icing:
Chill your mixing bowl and beaters in the freezer for about 10 minutes. Then the chilled large metal bow beat the butter and powder sugar together for about 1 minute. Then slowly add the heavy whipping cream and whip until stiff peaks form. Then stir in vanilla and orange zest. Now you are ready to top your Dreamsicle Cupcakes!
Refrigerate cupcakes until ready to serve. Enjoy!
Hi everyone, I will be taking a break from blogging all through April. My house is demanding to be cleaned and organized or maybe it’s just me ;) Thank you for your patience and understanding. You can still find me on:
Pinterest
Facebook
Twitter
and
Instagram.
Happy Spring Cleaning!
My local grocery store recently had fresh pineapples on sale for a $1, so I have been in pineapple heaven. I recently created this smoothie, not only was it economically friendly but it was delicious too. All the fresh flavors of summertime sit right here in this little mason jar waiting for you to enjoy!
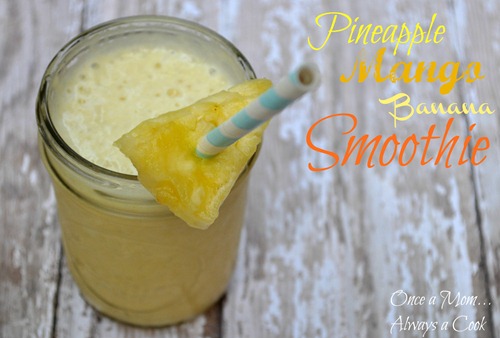
Pineapple, Mango, Banana Smoothie
makes about 5 cups
2 cups of fresh pineapple, cubed
Need a tutorial on how to cut a pineapple, click here
1 cup frozen mango
1 banana
1 cup of 1% milk, or any milk of your choice
1 cup ice
sugar to taste
Combine all ingredients in a blender and blend until smooth!
'Tis the season for eggs and I made you an Avocado Egg Salad Sandwich.
Hope you enjoy this recipe!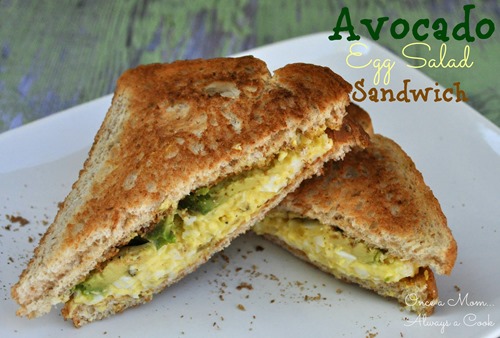
Ingredients:
this recipe makes 4 sandwiches
6 hard boiled eggs, peeled
5 TBS mayo (I use lite mayo)
1 TBS Dijon mustard
2 TBS dill pickle relish or sweet relish
1 small celery stalk (close to the heart), finely chopped
1 TBS shallot, finely chopped
fresh lemon juice (to taste)
paprika (to taste)
garlic and herb seasoning (to taste)
salt and pepper (to taste)
8 toasted bread slices
1 large avocado, thinly sliced
On a large dinner plate, mash hard boil eggs with a fork until fluffy. Then add smashed eggs to a medium size bowl. Then add mayo, mustard, pickle relish, celery, shallot, squeeze of fresh lemon juice, and seasonings. Mix well and spread the egg salad on a toasted bread slice, add sliced avocados, and then top with an additional slice of toasted bread.
Zucchini pizza sticks are not only fun to eat but are super healthy and low calorie. My kids love zucchini and pizza so I knew they were going to love this recipe. Serve with a veggie pasta salad, click here for the recipe, and you have a complete meal everyone will love. These pizza sticks also make a wonderful light and easy lunch option or a happy after school snack.
What you need:
4 zucchini
turkey pepperoni
pizza sauce
click here for my homemade pizza sauce
shredded mozzarella cheese
seasoned bread crumbs
click here for my bread crumb recipe
(I added 1/2 tsp oregano, 1/2 tsp marjoram, 1/2 tsp of basil to my bread crumbs. I also cut the bread crumb recipe in half only using 2 slices of bread)
olive oil
Directions:
First, preheat your oven to 400 degrees. Now cut the zucchini in half lengthwise. Then scrape out the middle section with a grapefruit spoon or melon baller. Spray or brush olive oil on the inside of the zucchini. Next add pizza sauce and turkey pepperoni.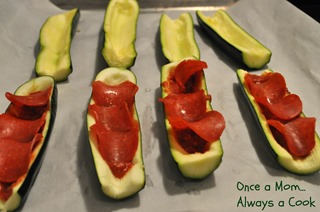
Finally, top with shredded mozzarella cheese and sprinkle with bread crumbs.
Cook for about 15 minutes or until cheese is bubbly and zucchini is as tender as you like. 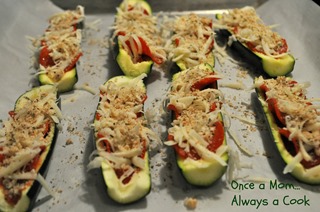
Enjoy!

I always get hugs and praises when my family smells the fresh aroma of this meal cooking. These are by far the best stuffed peppers I have ever had! I know the process seems long, but if you love a good Mexican rice and Tex-Mex flavors you will not regret making this recipe. I hope you enjoy these Grilled Tex-Mex Stuffed Bell Peppers soon. They are delicious!
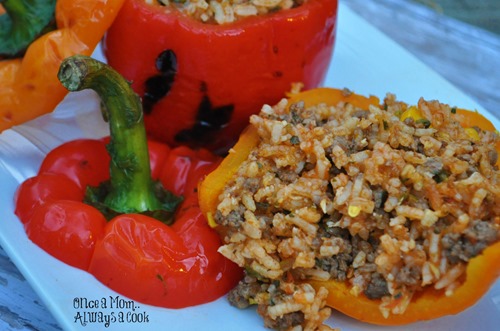
Ingredients
Ground Beef Seasoning
1/2 tsp chili powder
1/2 tsp garlic powder
1/2 tsp onion powder
1/2 tsp oregano
1/4 tsp cumin
salt and pepper, to taste
Directions Mexican Rice
adapted from Food.com
Ingredients:
6 Campari tomatoes (or any tomato of your choice)
1 small/medium sweet yellow onion
2 medium jalapenos (ribs and seeds removed)
2 cups long grain white rice
1/3 cup canola or vegetable oil
(I have also used coconut oil)
4 minced garlic cloves
2 cups chicken broth (low sodium)
1/2 cup frozen sweet corn
1 tablespoon tomato paste
1 tsp chili powder
1 tsp oregano
1/2 tsp cumin
1 1/2 teaspoons salt
1/4 cup fresh cilantro, minced (may add more to your liking)
Directions:
Adjust rack to middle position and preheat oven to 350.
Puree tomatoes and onion in a food processor or blender.
Reserve exactly 2 cups.
(6 Campari tomatoes and 1/2 of a large sweet yellow onion made approximately 2 cups)
Mince jalapenos and garlic, set aside
Place rice in a fine mesh strainer and rinse under cold running water until water runs clear- about 1 1/2 minutes. Shake rice vigorously to remove excess water.This step removes the starch from the rice so it will not stick.
IF YOU OMIT THIS STEP YOUR RICE WILL NOT BE DRY AND FLUFFY.
Heat oil in heavy bottomed oven safe straight sided sauté pan or Dutch oven with tight fitting lid over low-medium heat about 2 minutes. Drop a few rice grains in and if they sizzle you are ready to pour in your rice.
Be careful that the oil doesn't get too hot too fast or the oil will splatter.
Fry rice stirring until rice is light golden and translucent, about 6-8 minutes.
Reduce heat to medium and add minced jalapenos and garlic. Cook, stirring constantly until fragrant, about 1 1/2 minutes.
Stir in broth, pureed mixture, tomato paste, seasonings, salt, and 1/2 cup of frozen sweet corn. Increase heat to medium high, and bring to a boil.
Cover pan and transfer pan to oven to bake until liquid is absorbed and rice is tender, 30-35 minutes. Stir well after 15 minutes.
Once rice is done stir in cilantro.
While the rice is cooking, brown and season the ground meat in a frying pan over medium high heat until no longer pink. Drain fat as needed.
Next, puree 3 tomatillos
Start preheating your grill!
When rice is done take out 2 cups of rice and set aside. Add to the remaining rice: cooked and seasoned ground beef, 3 tomatillos (pureed), the juice of 1-2 limes (optional), and 2/3 cup colby jack cheese and mix well. Use the extra 2 cups of rice for leftovers or anyway you see fit!
Now you are ready to stuff your peppers!
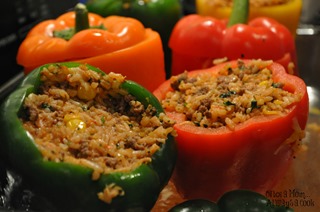
Next, lay the stuffed pepper on foil and spray with olive oil. Don't forget the top!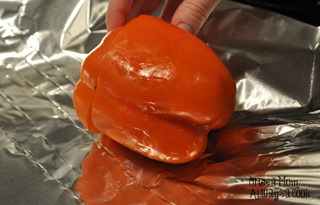
Finally, wrap the entire pepper in foil! I grill my pepper for 15-20 minutes (or until tender) at 400 degrees turning every 5 minutes. 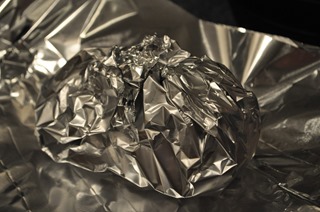
Unwrap and enjoy all the goodness!

Happy Day Light Savings Time! Yay, more sunlight in the days to come. As winter is coming to an end and spring is spouting forward, warm days are near. Smoothies are a favorite in this house when warm weather arrives and my family adores this combination of strawberry, peach, and banana. I hope you and your family will enjoy these refreshing flavors soon! Smoothies make breakfast a breeze and a wonderful snack choice between meals or after school.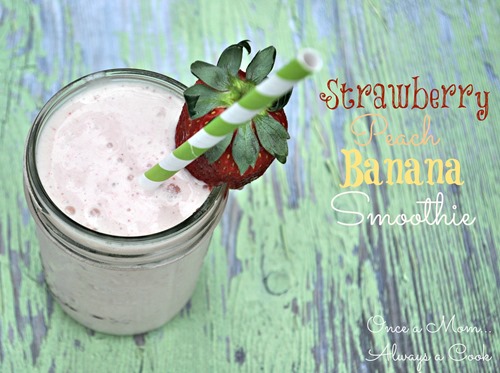
Ingredients:
makes 5 cups
1 cup frozen strawberries
1 cup frozen peaches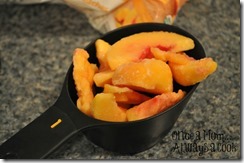
1 banana
1-2 TBS (or to taste) of raw sugar, or sugar of your choice
(depends on the sweetness of the fruit)
2 cups 1% milk, or any milk of your choice
Combine all ingredients in a blender and blend until smooth!
If using fresh fruit add ice as needed to reach your desired consistency.
Enjoy!

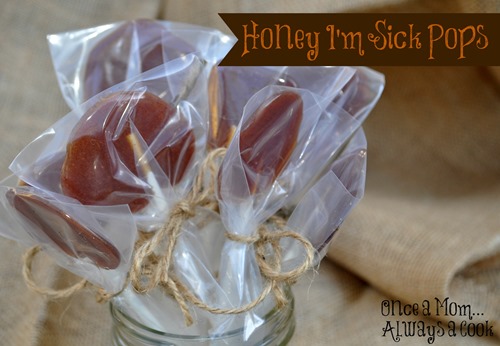
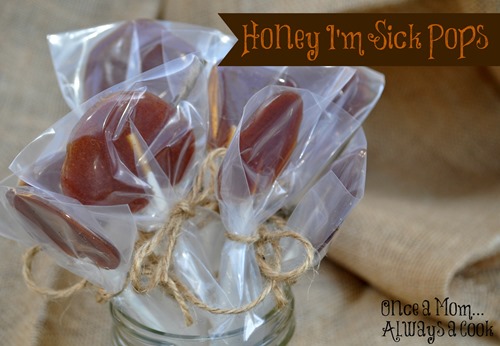
I have 3 sick kiddos this week that are experiencing coughing, stuffy noses, and sore throats :( Good thing I recently saw a recipe for honey lollipops over at
Fountain Avenue Kitchen.
I followed Ann's directions but added a little vanilla extract to my batch! Below is instructions to what I did and the outcome was wonderful! All my kids loved them and said the honey pops offered relief to their sore throats.
You Will Need:
1/2 cup honey (I use local honey)
1/2 tsp cinnamon (optional)
1/4 tsp vanilla
lollipop sticks
This batch made 18, this number will vary depending on how big or small you make your pops. You can always cut this recipe in half for a smaller recipe.
I chose to put cinnamon in my honey pops because I have been researching all the benefits honey and cinnamon provide together!
First, in a small sauce pan heat 1/2 cup of honey until the temperature reaches 300 degrees on a candy thermometer, stir occasionally.
If you do not have a candy thermometer Ann suggests
dropping a drip or two of honey into a bowl of very cold water. If the honey hardens into a ball, it is ready. If it remains soft to the touch, return to a boil.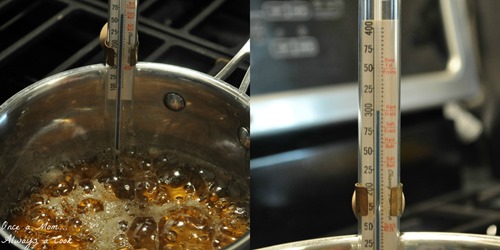
Once your honey reaches 300 degrees quickly take off burner and then add cinnamon and vanilla extract. Stir until mixed well. Let the honey mixture cool for a few minutes and line two baking sheet with parchment paper.
Place lollipop sticks across the prepared baking sheets. If your lollipop sticks with not stay in place, dip in honey first and then place them on the baking sheet. Now with a spoon gently pour your desired amount of honey over the lollipop sticks. Let the honey pops cool completely. 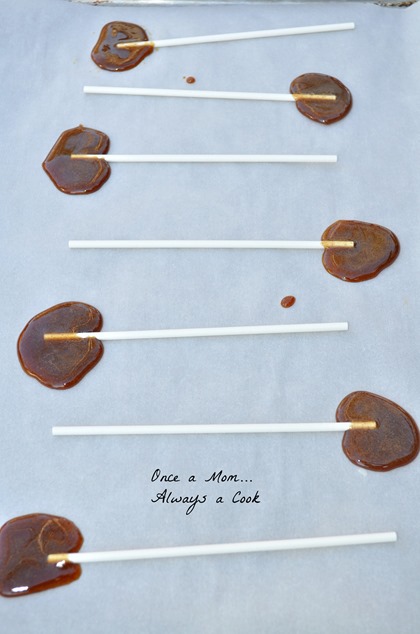
Do not give to children younger than one.
I suggest to give no more than 3 honey pops a day. Do not allow your children to chew on the honey sticks because it is hard on their teeth. Encourage your children to suck on the honey pops. Always supervise small children when eating any type of lollipops.
Individual wrap and use when needed!
After making this cute bouquet of honey pops, I thought what a nice surprise this would be to a family member or friend when they are not feeling well! 