April 30, 2012

Must Try Monday {Orange Vinegar}

I love cleaning with vinegar, so when my food blogger friend
 Fountain Avenue Kitchen
posted a recipe for orange vinegar I had to try it!

orange peels in vinegar

16 oz canning jar
3 small orange peels or 2 large orange peels
white vinegar (enough to cover the orange peels)

Place orange peels in jar. Fit as many orange peels as your jar will allow you to fit.  Then pour vinegar over the orange peels and close tightly. Store under cabinet for 2 weeks. Enjoy all the essence of orange and the cleaning power of vinegar.

Click here for my "green" all purpose/ glass cleaner recipe, I used the orange vinegar in place of vinegar and lemon juice to make orange all purpose/ glass cleaner!

Also,
click here to find out how to remove those nasty water deposits off your fridge water dispenser tray!

Seriously, is there anything vinegar cannot do?!?!
Hope you are inspired to try this recipe yourself and create
"green cleaning" in your home!

April 25, 2012

BBQ Chicken Pizza


Today Kevin from 1000 Beers is co-hosting with me to bring you the perfect manly meal, brought to you by Appliance Online.
Don't get me wrong women will enjoy this pizza and beer too, but if you are looking to please your man's appetite then look no further.
Today we have BBQ Chicken Pizza

BBQ Chicken Pizza

and Kevin reviewed a single-hopped red ale beer
to compliment this pizza.
Hop over to 1000 Beers to read the full review.
If you ever want to now anything about beer
his blog is the place to go.

 1000 Beers

What you need:
2 small boneless, skinless chicken breast
1/4 cup of your favorite BBQ Sauce
2 TBS apple cider vinegar (optional)
Salt and Pepper
1 12-14 inch pizza dough
{If you are looking for wonderful
bread machine pizza dough click here}
1-2 TBS olive oil
1 tsp garlic and herb seasoning
1/3 cup of your favorite BBQ sauce
1 TBS Tiger Sauce
1/2 red onion, finely chopped
Shredded Mozzarella Cheese
Shredded Colby Jack Cheese
 
Directions:
First, marinate your chicken breast in 1/4 cup BBQ sauce, apple cider vinegar, and salt & pepper. Marinate the chicken for about 20 minutes. Then grill the chicken @ 400 degrees until the internal temperature reaches 165 degrees. Once your chicken is done allow to rest 5 minutes before cutting.
BBQ Chicken
Next, finely chop red onion and chicken into small pieces.
Purple Onion and BBQ Chicken

Then, mix olive oil and garlic and herb seasoning.
Brush mixture over dough. Afterward, mix the additional 1/3 cup BBQ sauce with tiger sauce and spread over the dough.
Brush Olive Oil

BBQ Sauce on Pizza
Now you are ready to place your toppings. Add your desired amount of shredded mozzarella, diced grilled chicken, red onions, and top with your desired amount of shredded Colby Jack cheese.

Place dough on foil and cook in a preheated oven at 450 F. This pizza is also excellent grilled! Click here for my tutorial on how to grill pizza!
If you are using a homemade dough, precook the dough for about 5 minutes on foil. Then remove from oven to add sauce and toppings. 

Cooking times will vary from gas to electric ovens. When the crust is stable enough remove the foil and let the pizza cook for an additional 5 minutes or until your desired crispiness. Removing the foil for the last 5 minutes will create a crispier crust.

And there you have it, a wonderful meal to make your man happy and satisfied!

BBQ Chicken Pizza

This blog post was brought to you by
Appliances Online.
Have a wonderful day and thank you for stopping by!

April 22, 2012

Happy Earth Day

To celebrate Earth Day the kids and I made Earth Rice Krispies Treats! This is a fun visual for little ones and gives you an open opportunity to inform them about how important their planet is to their future! This fun family project can allow you to talk about ways everyone can save energy around the house!

Earth Rice Krispies Treat

These are a few ways we try to reduce energy around our house!

-turn off the water while brushing our teeth

-turn off lights in a room when it is not in use

-place recycling where everyone can use it

Ok, now onto the recipe and tutorial...

3 tablespoons butter or margarine
1 package (10 oz., about 40) regular marshmallows
or
4 cups miniature marshmallows
6 cups Kellogg's® Rice Krispies® cereal
blue food coloring
green food coloring

Note
-For best results, use fresh marshmallows.
-1 jar (7 oz.) marshmallow crème can be substituted for marshmallows.
-Diet, reduced calorie or tub margarine is not recommended.
-Store no more than two days at room temperature in airtight container.

Divide all ingredients in half. You will need two pans, one pan for blue and the second pan for green.
In two large saucepans melt butter over low heat.
 

melt butter

Divide marshmallows in half, add 14 drops of blue food coloring to one pan and 14 drops of green food coloring to the other pan. Stir until completely melted.
Remove from heat.
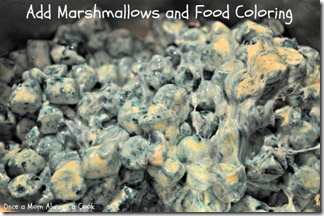
 

Coloring Marshmallows for Rice Krispies Treats


Add  3 cups of KELLOGG'S RICE KRISPIES cereal to each pan.
Stir quickly until well coated.
Then, with cooking spray coat 2 large mixing bowls and add the green mixture to one bowl and add the blue mixture to the other bowl.
 

Green Rice Krispies

Blue Rice Krispies

Once the mixture is cool (5-10 min), spray hands with cooking spray, then use your hands to combine the colors and form into a ball. Make into any size you like! Yes, your hands will be sticky, but not too bad :)
Best if served the same day.

Earth Day Rice Krispies Treats

This is my little one enjoying this beautiful day outside and eating "My Planet", so he says!

Earth Day Treat

April 19, 2012

Pita Pizza Pockets

These were actually invented by my husband one day when he was looking for a new, quick and easy lunch. I am sure we are not the first ones to make these cute little pizza pockets, but the day my husband pulled these out of the oven the kids and I were in awe of his brilliance! Pita Pizza Pockets are a super easy after school snack, a fun Saturday lunch, or a quick dinner option for a busy night!

Pita Pizza Pockets

1 package of mini multi grain pita pockets
8 oz shredded mozzarella cheese
veggies of your choice-
I used bell peppers, spinach, and black olives in this batch
turkey pepperoni
pizza sauce (recipe below)

Homemade Pizza Sauce
6oz can tomato paste
6 fl oz of warm water
1 1/2 TBS grated Parmesan cheese
1 TBS honey
1/4 tsp garlic powder (or to taste)
1/2 tsp onion powder (or to taste)
1/2 tsp oregano
1/2 tsp marjoram
1/2 tsp basil
1/8 tsp of black pepper
a small pinch cayenne pepper
kosher Salt to taste

Mix all ingredients in a bowl

Preheat oven @ 400 degrees. Then add sauce to pita pockets. Next add cheese, pepperoni, and veggies. Place on a cookie sheet lined with foil and cook until cheese is melted and bubbly. My family warms the extra pizza sauce and uses it for dipping.
Enjoy this meal with a nice garden salad topped with
Creamy Italian Dressing!
YUM, YUM !
Thank you for stopping by and have a wonderful day :)

April 17, 2012

Tuesday's Kitchen Tip {Is it done yet?}

I cannot express how obsessed I am about my meat being at a safe temperature! I have a hidden fear of serving my family undercooked meat and because of this secret anxiety I have overcooked my fair share of meat. Now I fear no more! I have a Digital Instant Read Probe Thermometer on hand at all times when cooking meat to ensure I do not under or overcook meat. I highly recommend an instant read over a dial thermometer. Not only does a instant read give you an accurate, fast, and visible read; it is all in a press of a button.

There are many thermometers to choose from, all ranging in price. I purchased a Taylor TruTemp Instant Read Digital Thermometer for about $10. It is everything you would expect out of a thermometer!
Never ask yourself, "Is it done yet?" again!


533893


USDA Recommended Safe Minimum Internal Temperatures
source

Did you know?
According to USDA research, 1 out of every 4 hamburgers turns brown before it reaches a safe internal temperature.

The only safe way to know if meat, poultry, and egg dishes are "done" is to use a food thermometer. When a hamburger is cooked to 160 °F as measured with a food thermometer, it is both safe and delicious!

Cook all raw beef, pork, lamb and veal steaks, chops, and roasts to a minimum internal temperature of 145 °F as measured with a food thermometer before removing meat from the heat source. For safety and quality, allow meat to rest for at least three minutes before carving or consuming. For reasons of personal preference, consumers may choose to cook meat to higher temperatures.

Cook all raw ground beef, pork, lamb, and veal to an internal temperature of 160 °F as measured with a food thermometer.

Cook all poultry to a safe minimum internal temperature of 165 °F as measured with a food thermometer.

Thank you for stopping by and have a wonderful day :)

Related Posts Plugin for WordPress, Blogger...